So what is the web edit frame buttons. Well those are the buttons that appears when you select an element on your experience editor and allows you to edit either external elements and/or fields that are not displayed on your page. They appears as per the below:
Once you click on the button then you will see a new popup to edit whatever fields you want on the item you want:
To configure it is quite simple:
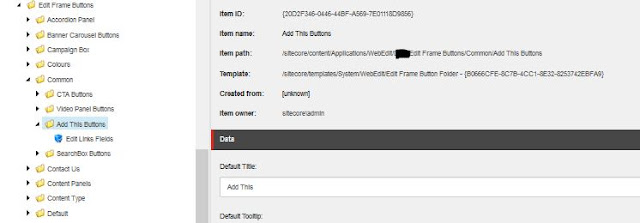
Go to the Core Database and locate the WebEdit section:
Locate the folder called Edit Frame Buttons (/sitecore/content/Applications/WebEdit/Edit Frame Buttons), this will give you a good sample of the buttons, especially the Edit one.
You can duplicate the folder and rename it as you would like. Then on the edit button you will be able to edit the following field:
You will notice that on the "Fields" field you will be able to add the "|" separated list of the fields you want to allow user to edit on the frame as per the below:
After defining the fields list available on your Edit button, you will need to do a bit of coding to ensure the webedit frame appears on the Experience Editor.
1- go to your view rendering and locate the section where you want the frame to appear
2- add the following using:
    using (BeginEditFrame(XXX.Common.Constants.ButtonItemPaths.Common.AddThisButtons, Model.Path))
    {

[+ Edit Add This for the Page]
}
The first parameter of your BeginEditFrame will be the path to the Folder you created on the Core DB:
XXX.Common.Constants.ButtonItemPaths.Common.AddThisButtons
will be something like
/sitecore/content/Applications/WebEdit/XXX/Edit Frame Buttons/Common/Add This Buttons
The second Parameter will be the path to the item you would like to edit:
Model.Path
will be something similar to
/sitecore/content/XXX/Home/About Us
There you go... you now have your Webedit buttons on your experience editor.


No comments:
Post a Comment